
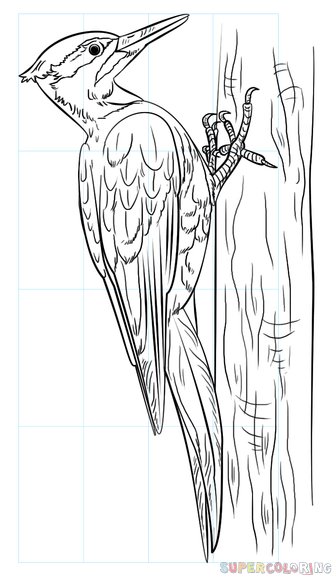
How to draw a woodpecker
This drawing is based on the photo of pileated woodpecker, a large woodpecker native to North America.

You can print out the base construction lines and start drawing on tracing paper or you can draw the grid layout yourself using the following steps… Show more
1) Draw a rectangle that will define the conditional proportions and boundaries of the chosen drawing.
2) From the middle of the rectangle, draw one vertical and one horizontal line equally dividing the shape.
3) Draw another horizontal line equally dividing the upper half of the rectangle. Similarly, draw a horizontal line equally dividing the bottom half of the rectangle.
4) Draw a vertical line equally dividing the left half of the rectangle. Similarly, draw a vertical line equally dividing the right half of the rectangle.
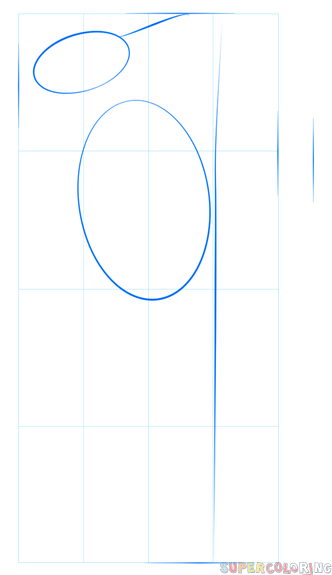
Mark off the width and height of the woodpecker. Draw two ovals that will help to define places for its head and body. Draw a line, which will act as the beak. Add the trunk of the tree.
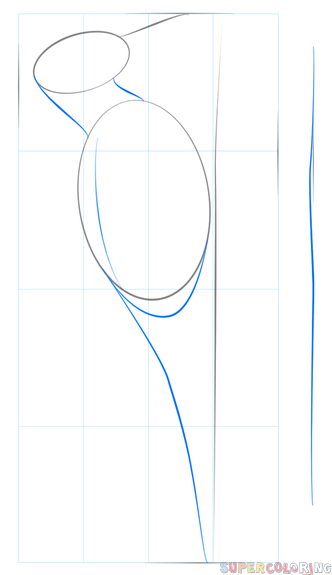
Draw the bird’s neck, body and trunk. Add a guideline for the tail.
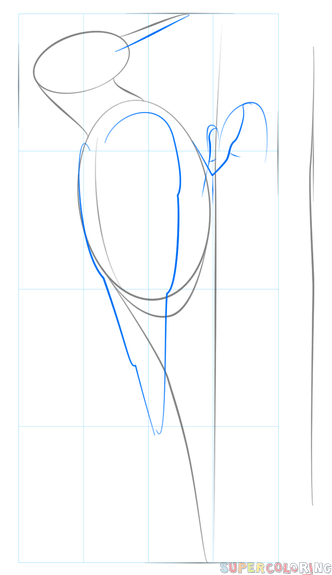
Define places for the legs, wings and mouth of the woodpecker.
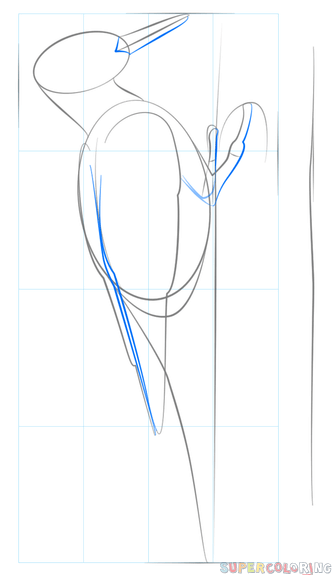
Mark off shapes for the legs, wings and beak.

Detail the shapes for the woodpecker’s wing and head. Add its eye, toes and tail.
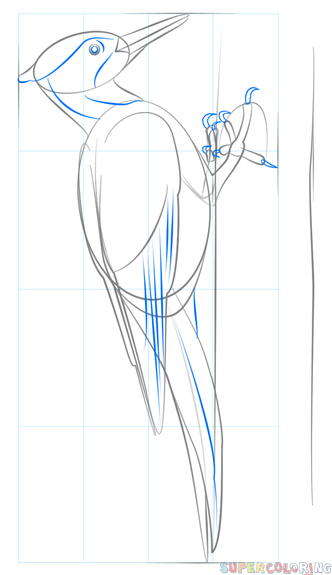
Outline the shapes of the feathers and claws. Work on the figure, paying special attention to detail.
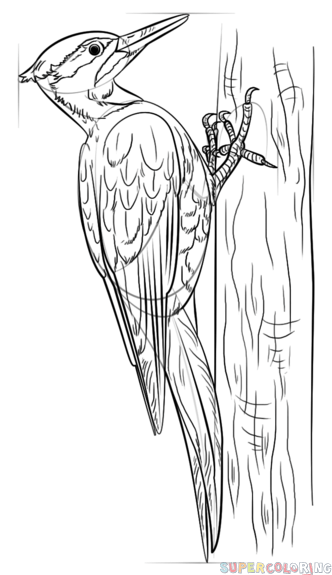
Contour the woodpecker, trying to vary the thickness and darkness of the line. Add more detail and add the trunk. Erase all guidelines.
Free for personal, educational, editorial or commercial use. This work is licensed under a Creative Commons Attribution-Share Alike 4.0 License. Attribution is required in case of distribution.
Related drawing tutorials


Related categories and tags


